🗺️ Supports 2×2, 4×4, 8×8, 16×16 and any custom size maps
🔄 Support map rotation
🌐 Supports custom DTM Providers 🆕
🌾 Automatically generates fields
🌽 Automatically generates farmlands
🌿 Automatically generates decorative foliage
🌲 Automatically generates forests
🌊 Automatically generates water planes
📈 Automatically generates splines 🆕
🛰️ Automatically downloads high resolution satellite images 🆕
🌍 Based on real-world data from OpenStreetMap
🗺️ Supports custom OSM maps
🏞️ Generates height map using SRTM dataset
📦 Provides a ready-to-use map template for the Giants Editor
🚜 Supports Farming Simulator 22 and 25
🔷 Generates *.obj files for background terrain based on the real-world height map
📄 Generates scripts to download high-resolution satellite images from QGIS in one click
📕 Detailed documentation and tutorials
🧰 Modder Toolbox to help you with various tasks
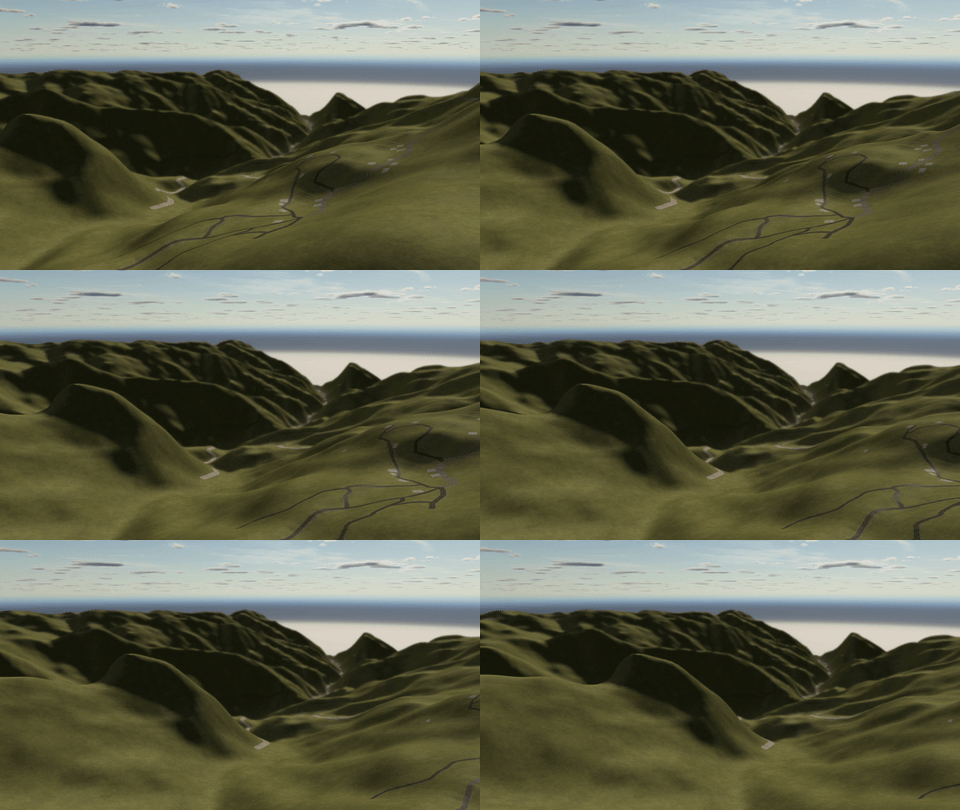
🌎 Detailed terrain based on real-world data.
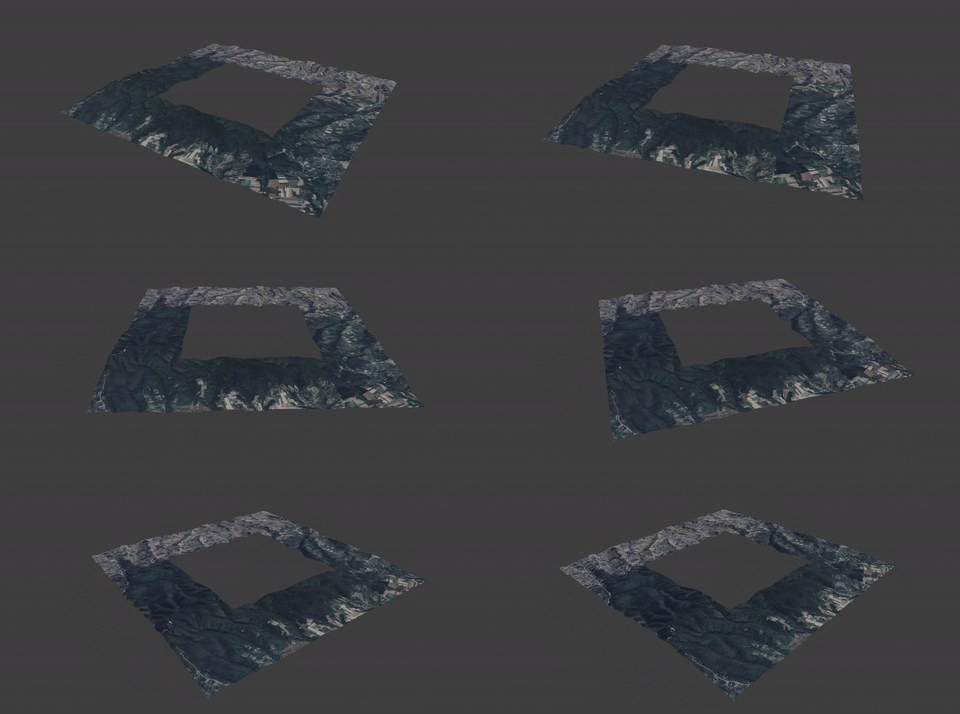
🛰️ Realistic background terrain with satellite images.
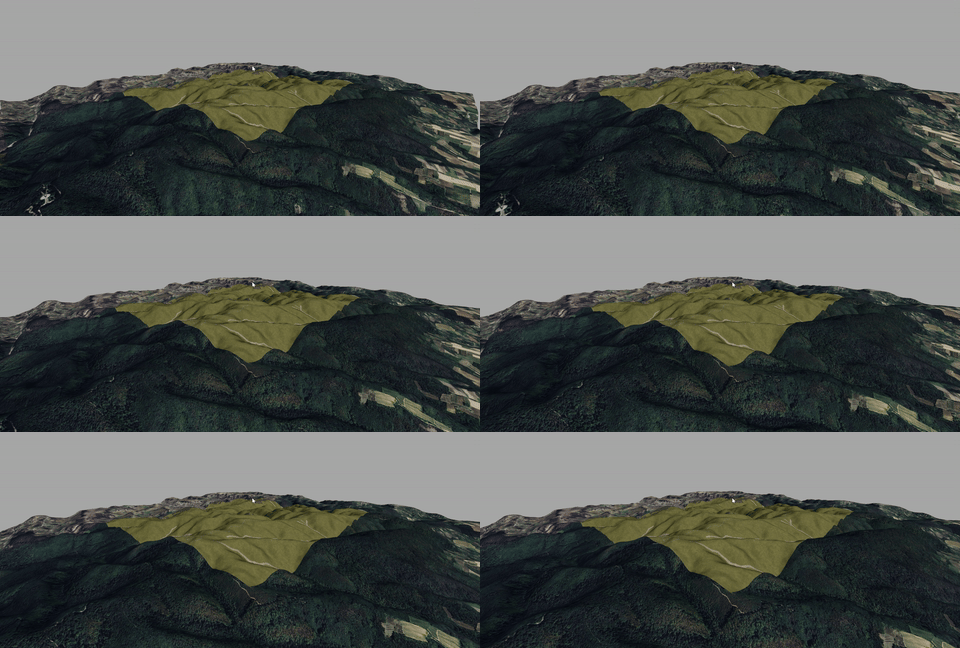
📐 Perfectly aligned background terrain.
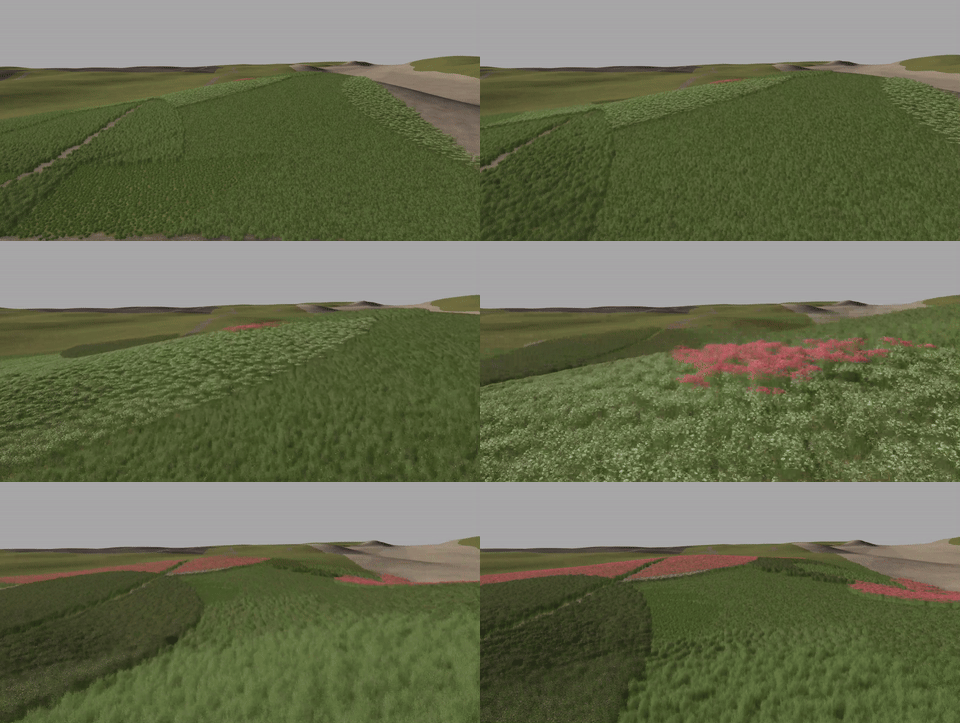
🌿 Automatically generates decorative foliage.
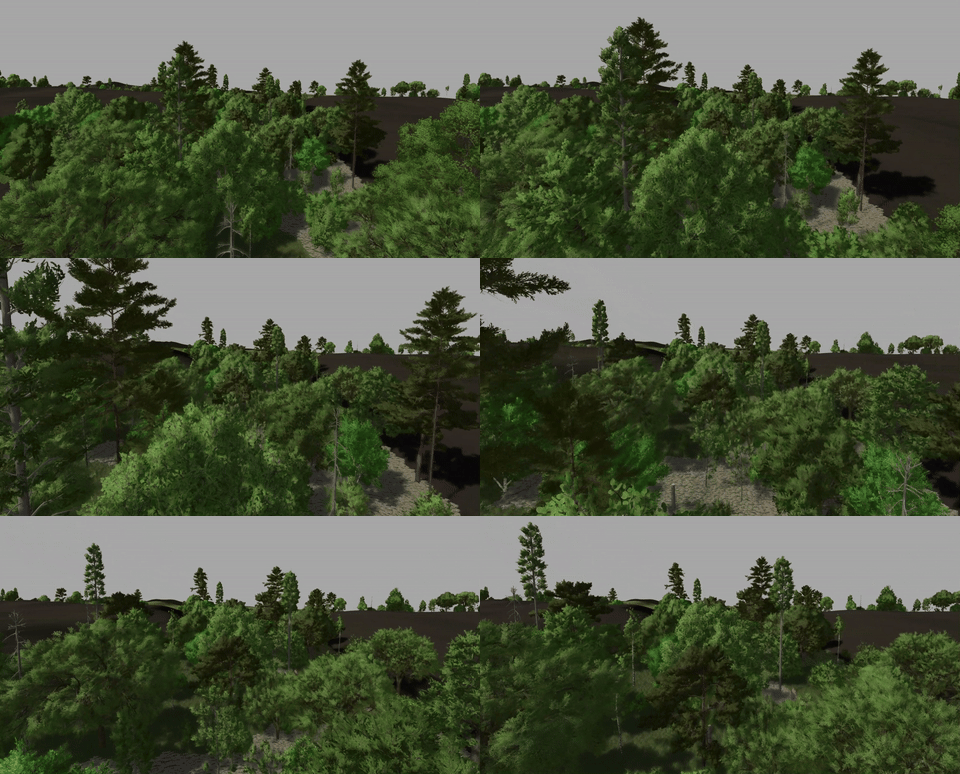
🌲 Automatically generates forests.
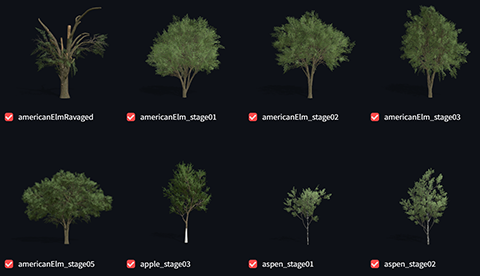
🌲 Allows to select trees for generation.
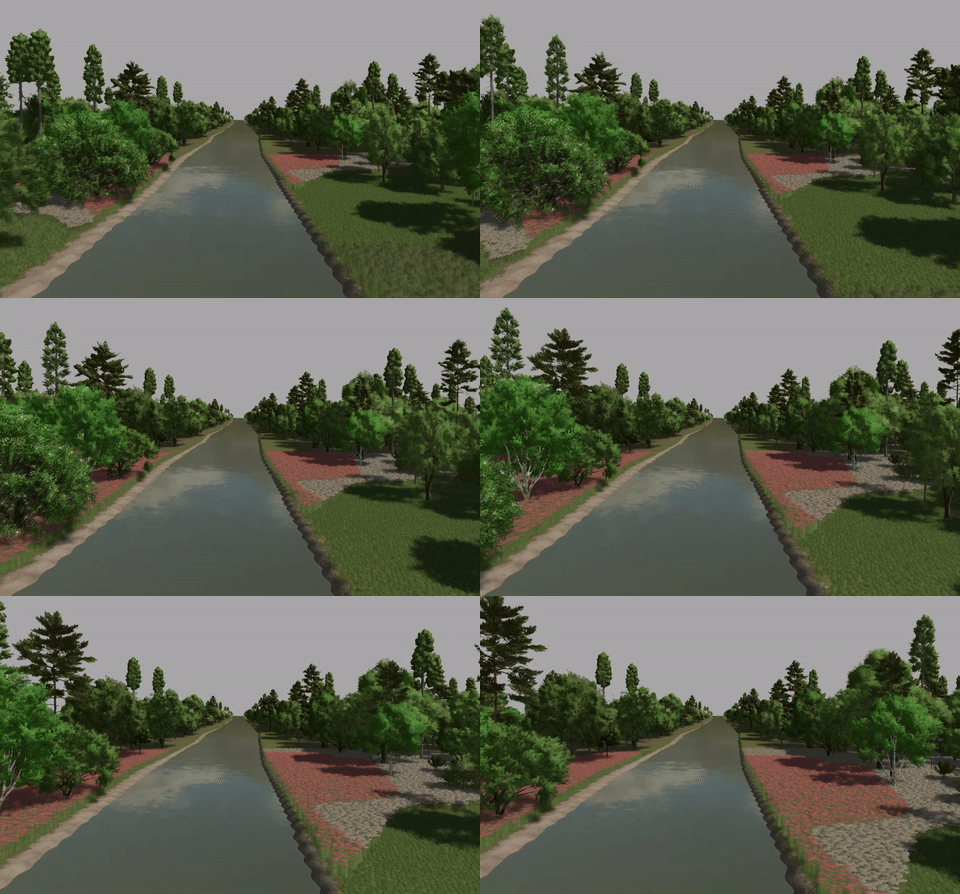
🌊 Automatically generates water planes.
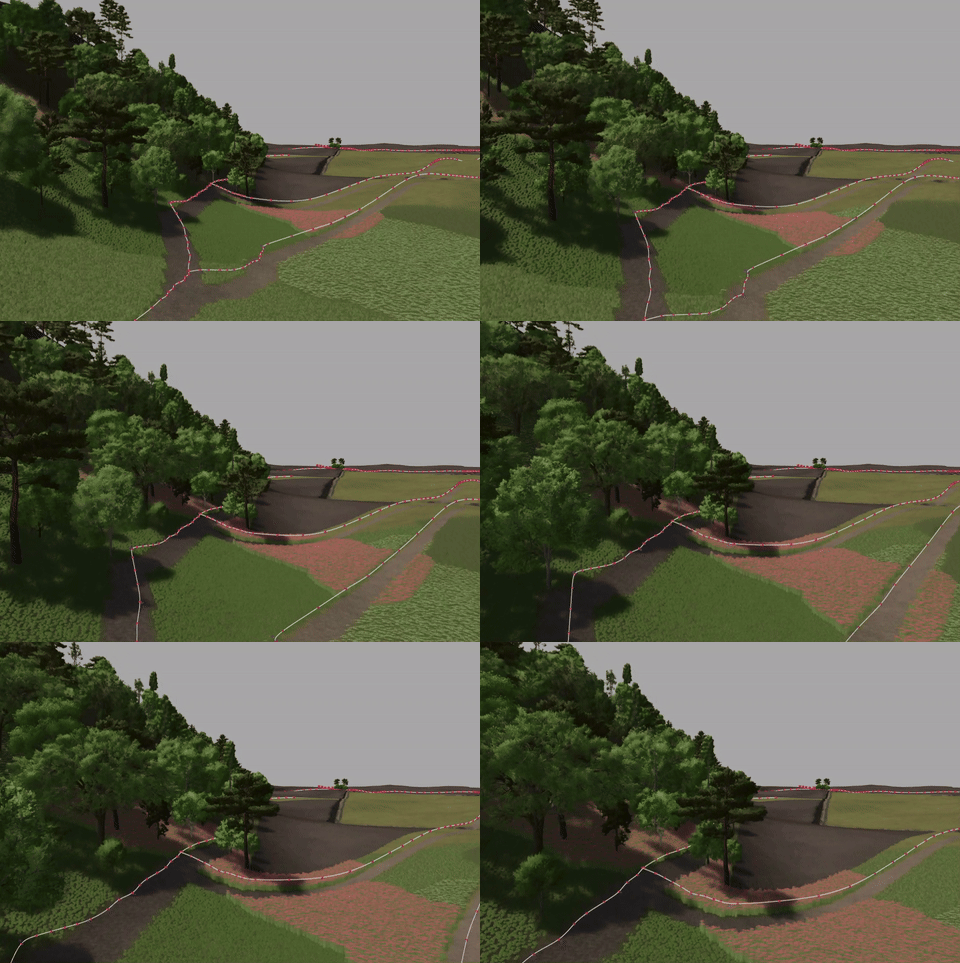
📈 Automatically generates splines.
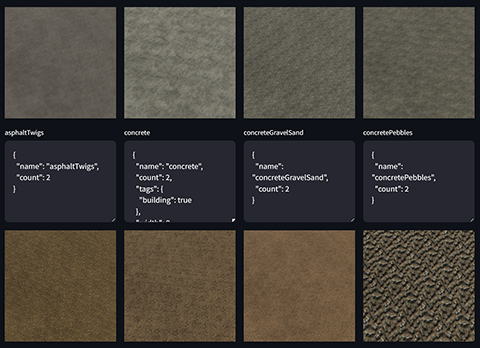
🖌️ Allows customization of the texture schema.
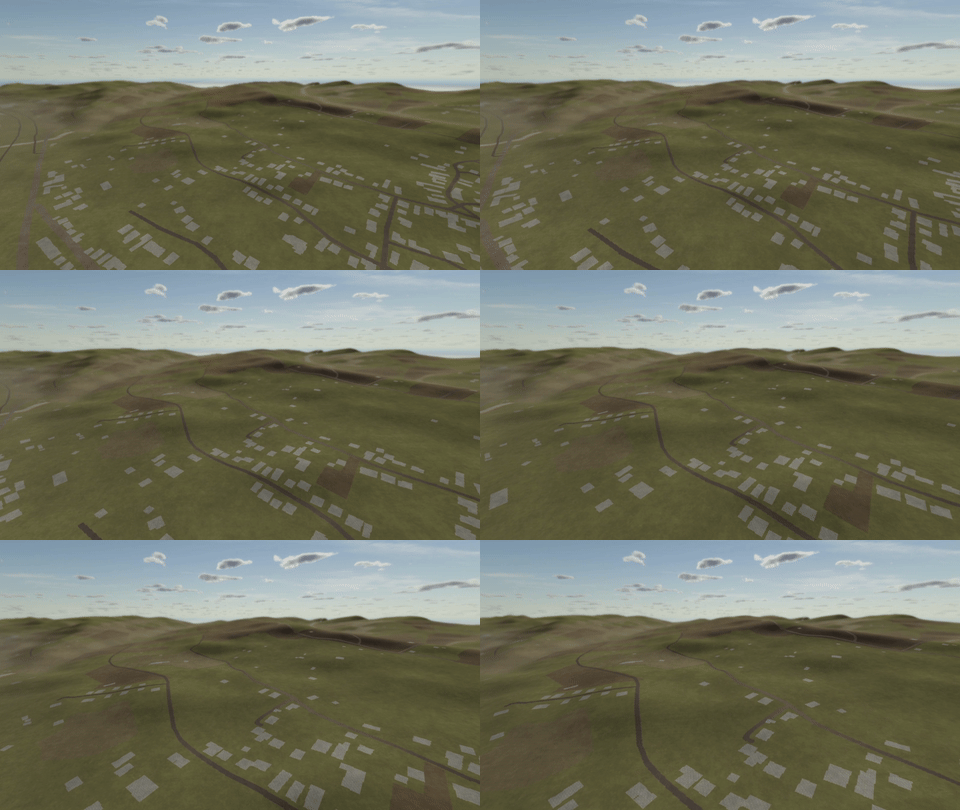
🗒️ True-to-life blueprints for fast and precise modding.
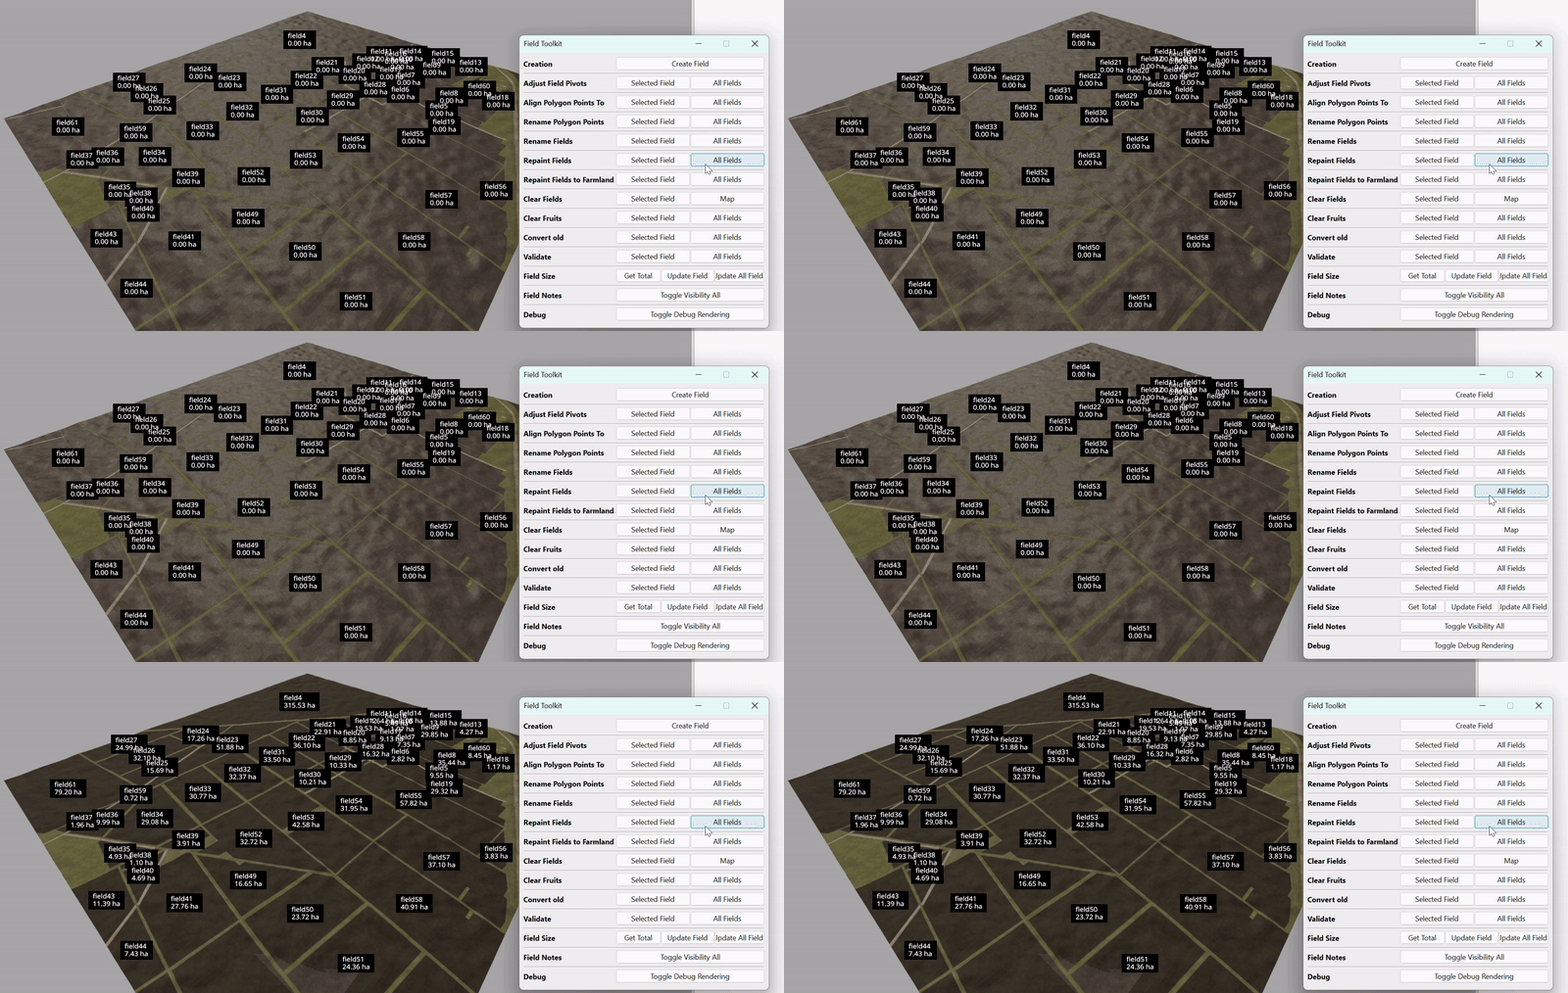
🌾 Field generation with one click.
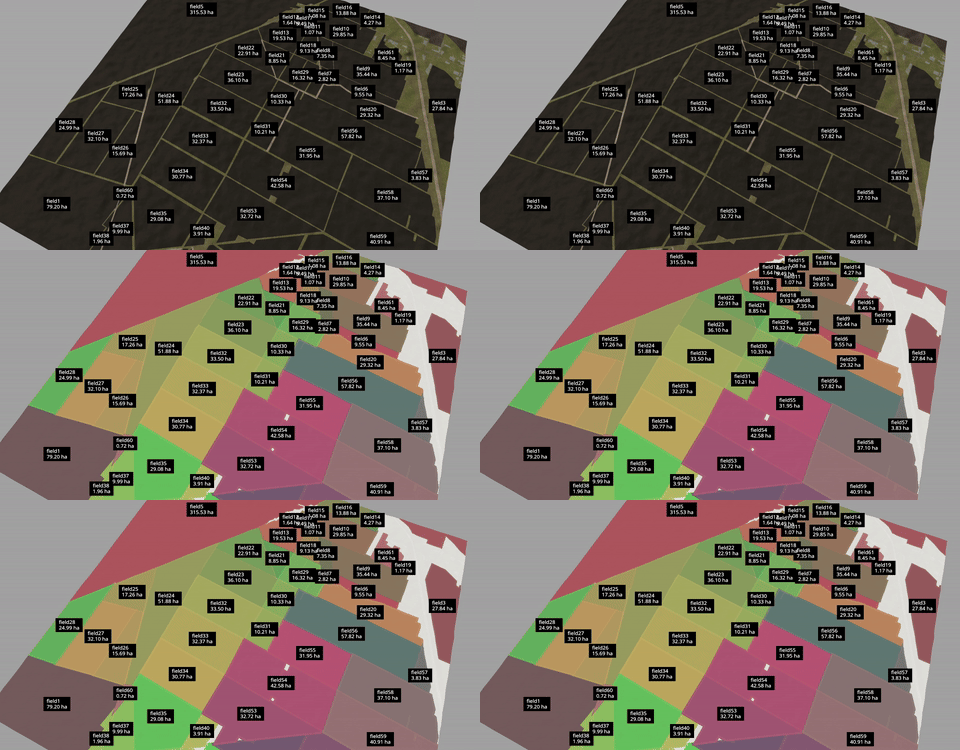
🌽 Automatic farmlands generation based on the fields.
📹 A complete step-by-step video tutorial is here!

How to Generate a Map for Farming Simulator 25 and 22 from a real place using maps4FS.
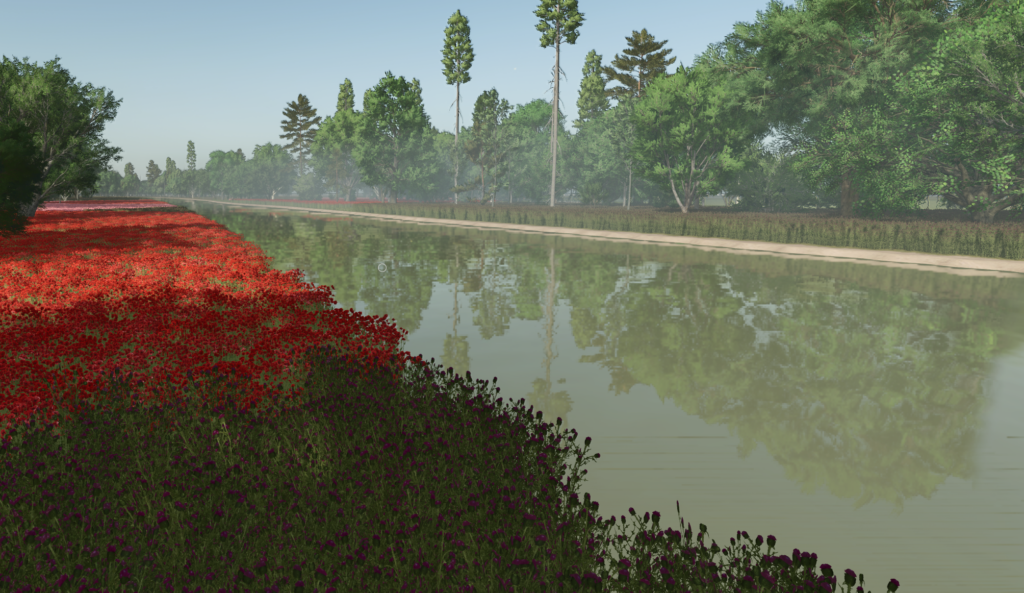
Map example generated with maps4fs.
Quick Start
There are several ways to use the tool. You obviously need the first one, but you can choose any of the others depending on your needs.
🚜 For most users
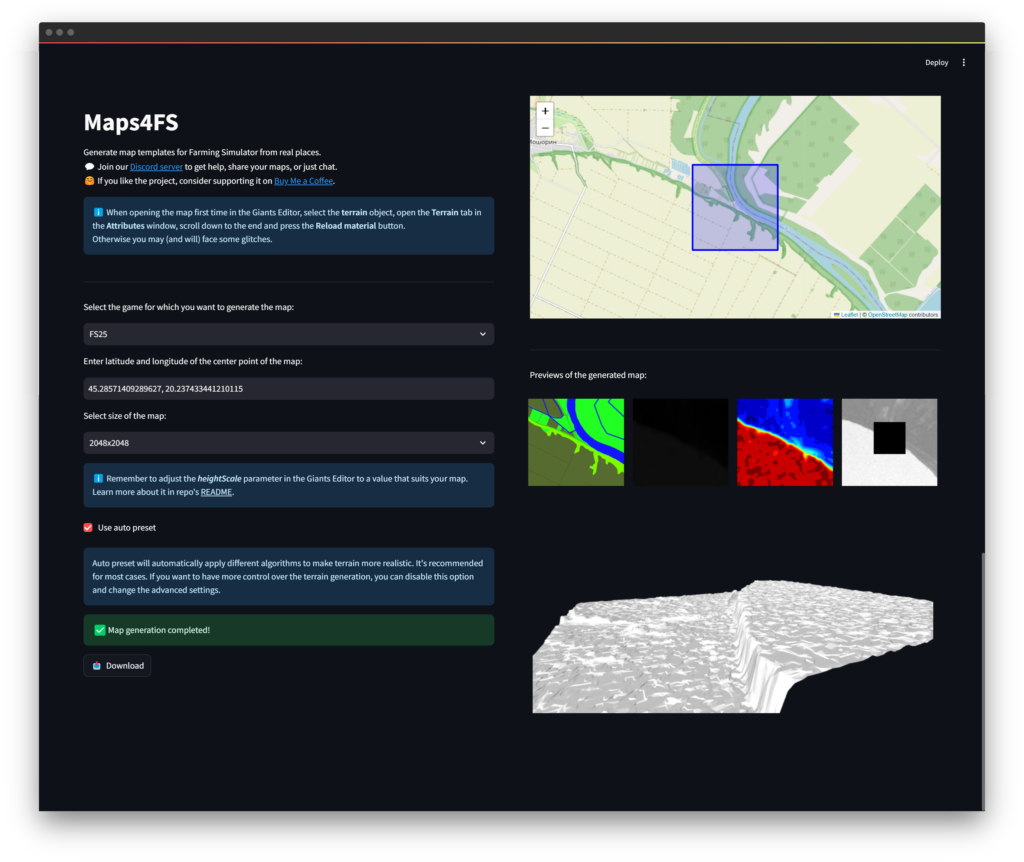
Option 1: Open the maps4fs and generate a map template in a few clicks.
😎 For advanced users
Option 2: Run the Docker version in your browser. Launch the following command in your terminal:
docker run -d -p 8501:8501 --name maps4fs iwatkot/maps4fs
And open http://localhost:8501 in your browser.
If you don’t know how to use Docker, navigate to the Docker version, it’s really simple.
Check out the Docker FAQ if you have any questions.
🤯 For developers
Option 3: Python package. Install the package using the following command:
pip install maps4fs
And refer to the Python package or run from the source section to learn how to use it.
Overview
The core idea is coming from the awesome maps4cim project.
The main goal of this project is to generate map templates, based on real-world data, for the Farming Simulator. It’s important to mention that templates are not maps. They are just a starting point for creating a map. This tool just uses built-in textures to highlight different types of terrain and buildings with correct shapes and scales and to generate a height map. The rest of the work is up to you. So if you thought that you could just run this tool and get a playable map, then I’m sorry to disappoint you. But if you are a map maker, then this tool will save you a lot of time.
So, if you’re new to map making, here’s a quick overview of the process:
- Generate a map template using this tool.
- Download the Giants Editor.
- Open the map template in the Giants Editor.
- Now you can start creating your map (adding roads, fields, buildings, etc.).
Previews
The generator also creates multiple previews of the map. Here’s the list of them:
- General preview – merging all the layers into one image with different colors.
- Grayscale DEM preview – a grayscale image of the height map (as it is).
- Colored DEM preview – a colored image of the height map (from blue to red). The blue color represents the lowest point, and the red color represents the highest point.
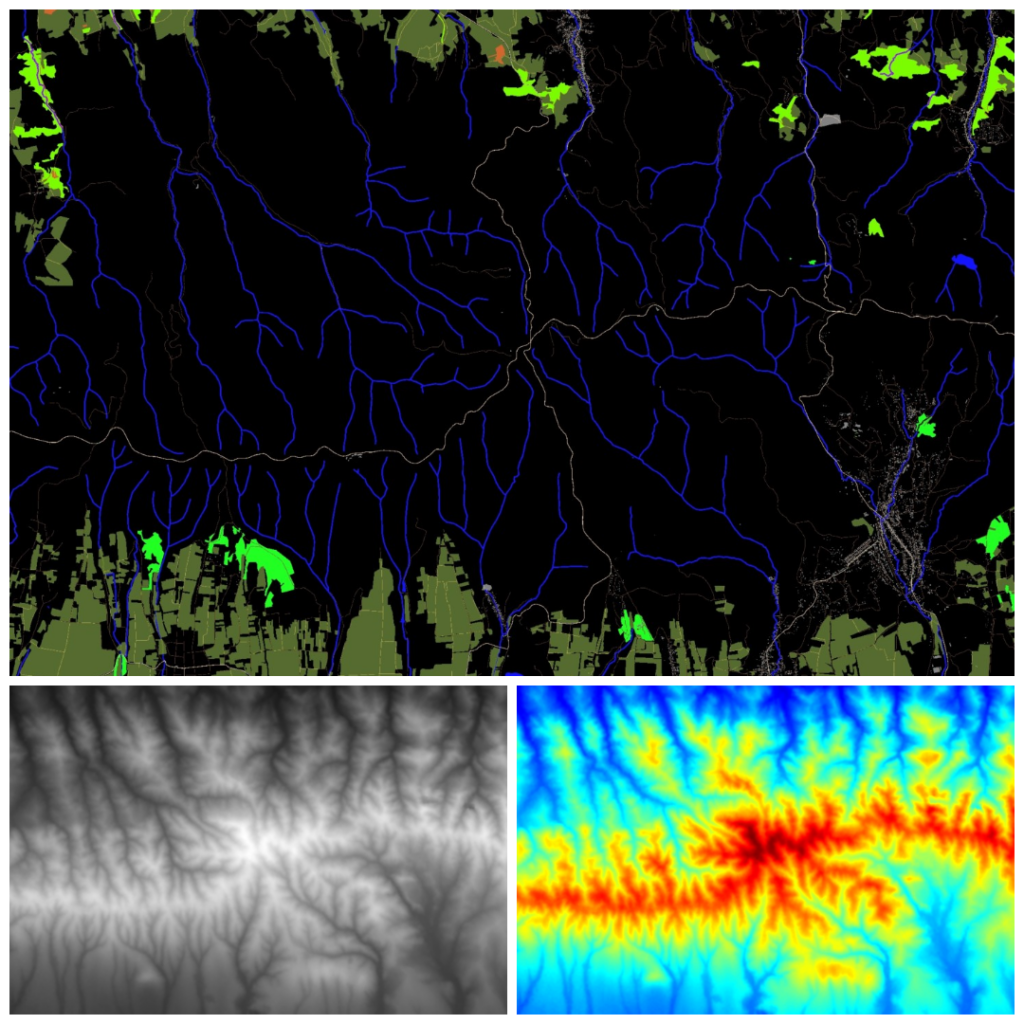
Preview of a 16 km map with a 500-meter mountain in the middle of it.
Parameters:
- coordinates: 45.15, 19.71
- size: 16 x 16 km
Step by step
Don’t know where to start? Don’t worry, just follow this step-by-step guide to create your first map in 10 simple steps.
How-To-Run
Option 1: Public version
🟢 Recommended for all users.
🛠️ Don’t need to install anything.
🗺️ Supported map sizes: 2×2, 4×4, 8×8 km.
⚙️ Advanced settings: enabled.
🖼️ Texture dissolving: enabled.
Using the public version on maps4fs.xyz is the easiest way to generate a map template. Just open the link and follow the instructions. Note: due to CPU and RAM limitations of the hosting, the generation may take some time. If you need faster processing, use the Docker version.
Using it is easy and doesn’t require any guides. Enjoy!
Option 2: Docker version
🟠 Recommended for users who want bigger maps, fast generation, nice-looking textures, and advanced settings.
🛠️ Launch with one single command.
🗺️ Supported map sizes: 2×2, 4×4, 8×8, 16×16 km and any custom size.
⚙️ Advanced settings: enabled.
🖼️ Texture dissolving: enabled.
Check out the Docker FAQ if you have any questions.
You can launch the project with minimalistic UI in your browser using Docker. Follow these steps:
- Install Docker for your OS.
- Run the following command in your terminal:
docker run -d -p 8501:8501 --name maps4fs iwatkot/maps4fs
- Open your browser and go to http://localhost:8501
- Fill in the required fields and click on the
Generatebutton. - When the map is generated click on the
Downloadbutton to get the map.
Option 3: Python package or source code
🔴 Recommended for developers.
🗺️ Supported map sizes: 2×2, 4×4, 8×8, 16×16 km and any custom size.
⚙️ Advanced settings: enabled.
🖼️ Texture dissolving: enabled.
You can use the Python package to generate maps. Follow these steps:
- Install the package from PyPI:
pip install maps4fs
Or clone the repository and install the package from the source code:
git clone https://github.com/iwatkot/maps4fs.git
cd maps4fs
dev/create_venv.ps1 # for Windows
sh dev/create_venv.sh # for Linux

# Activate the virtual environment.
./venv/scripts/activate # for Windows
source venv/bin/activate # for Linux

# Edit the demo.py file to set the parameters.
python demo.py
- Import the Game class and create an instance of it:
import maps4fs as mfs

game_code = "fs25"
game = mfs.Game.from_code(game_code)

dtm_provider = mfs.SRTM30Provider
dtm_provider_settings = mfs.SRTM30ProviderSettings(easy_mode=True, power_factor=0)

lat, lon = 45.28, 20.23
coordinates = (lat, lon)
size = 2048
rotation = 25

map_directory = "map_directory"
os.makedirs(map_directory, exist_ok=True)

mp = mfs.Map(
    game,
    dtm_provider,
    dtm_provider_settings,
    coordinates,
    size,
    rotation,
    map_directory,
)
In this case, the library will use the default templates, which should be present in the data directory, which should be placed in the current working directory.
Structure example:
📁 data
 ┣ 📄 fs22-map-template.zip
 ┗ 📄 fs22-texture-schema.json
So it’s recommended to download the data directory from the repository and place it in the root of your project.
- Launch the generation process.
Thegeneratemethod returns a generator, which yields the active component of the map. You can use it to track the progress of the generation process.
for component_name in mp.generate():
    print(f"Generating {component_name}...")
The map will be saved in the map_directory directory.
➡️ Check out the demo.py file for a complete example.
Modder Toolbox
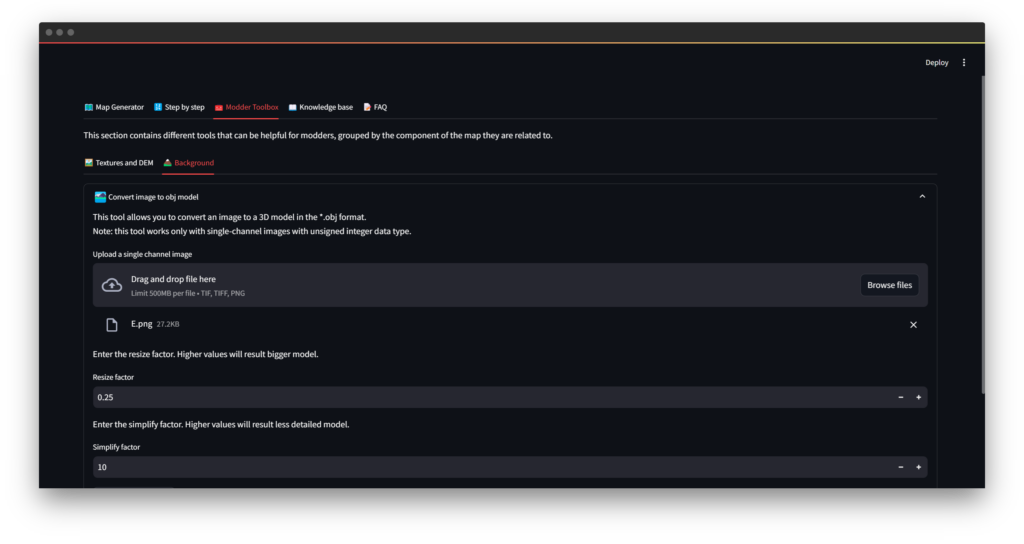
The tool now has a Modder Toolbox, which is a set of tools to help you with various tasks. You can open the toolbox by switching to the 🧰 Modder Toolbox tab in the StreamLit app.
Tool Categories
Tools are divided into categories, which are listed below.
For custom schemas
-
Tree Schema Editor – allows you to view all the supported trees models and select the ones you need on your map. After it, you should click the Show updated schema button and copy the JSON schema to the clipboard. Then you can use it in the Expert settings to generate the map with the selected trees.
-
Texture Schema Editor – allows you to view all the supported textures and edit their parameters, such as priority, OSM tags and so on. After editing, you should click the Show updated schema button and copy the JSON schema to the clipboard. Then you can use it in the Expert settings to generate the map with the updated textures.
For Textures and DEM
-
Fix custom OSM file – this tool fixes the most common errors in the custom OSM file, but it can not guarantee that the file will be fixed completely if some non-common errors are present.
-
GeoTIFF windowing – allows you to upload your GeoTIFF file and select the region of interest to extract it from the image. It’s useful when you have high-resolution DEM data and want to create a height map using it.
For Background terrain
- Convert image to obj model – allows you to convert the image to the obj model. You can use this tool to create the background terrain for your map. It can be extremely useful if you have access to the sources of high-resolution DEM data and want to create the background terrain using it.
Supported objects
The project is based on the OpenStreetMap data. So, refer to this page to understand the list below.
You can find the active schemas here:
- FS25
- FS22
Learn more how to work with the schema in the Texture schema section. You can also use your own schema in the Expert settings section.
Generation info
The script will generate the generation_info.json file in the output folder. It is split into different sections, which represent the components of the map generator. You may need this information to use some other tools and services to obtain additional data for your map.
List of components:
Config– this component handles themap.xmlfile, where the basic description of the map is stored.Texture– this component describes the textures, that were used to generate the map.DEM– this component describes the Digital Elevation Model (the one which creates terrain on your map), which was used to generate the height map and related to thedem.pngfile.I3d– this component describes the i3d file, where some specific attributes properties, and paths to the files are stored.Background– this component describes the 8 tiles, that surround the map.
Below you’ll find descriptions of the components and the fields that they contain.
ℹ️ If there’s no information about the component, it means that at the moment it does not store any data in the generation_info.json file.
Config
Example of the Config component:
"Config": {
    "Overview": {
        "epsg3857_string": "2249906.6679576184,2255734.9033189337,5663700.389039194,5669528.6247056825 [EPSG:3857]",
        "south": 45.304132173367165,
        "west": 45.267296012425376,
        "north": 20.263611405732693,
        "east": 20.211255476687537,
        "height": 4096,
        "width": 4096
    }
},
The Overview section contains information to create an overview image, which represents the in-game map. You can use the epsg3857_string to obtain the satellite images in the QGIS. So this section describes the region of the map plus the borders. Usually, it’s exactly 2X the size of the map.
And here’s the list of the fields:
"epsg3857_string"– the string representation of the bounding box in the EPSG:3857 projection, it is required to obtain the satellite images in the QGIS,"south"– the southern border of overview region,"west"– the western border of overview region,"north"– the northern border of overview region,"east"– the eastern border of overview region,"height"– the height of the overview region in meters (2X the size of the map),"width"– the width of the overview region in meters,
Texture
Example of the Texture component:
"Texture": {
    "coordinates": [
        45.28571409289627,
        20.237433441210115
    ],
    "bbox": [
        45.29492313313172,
        45.27650505266082,
        20.250522423471406,
        20.224344458948824
    ],
    "map_height": 2048,
    "map_width": 2048,
    "minimum_x": 439161.2439774908,
    "minimum_y": 5013940.540089059,
    "maximum_x": 441233.5397821935,
    "maximum_y": 5016006.074349126,
},
And here’s the list of the fields:
"coordinates"– the coordinates of the map center which you entered,"bbox"– the bounding box of the map in lat and lon,"map_height"– the height of the map in meters (this one is from the user input, e.g. 2048 and so on),"map_width"– the width of the map in meters (same as above),"minimum_x"– the minimum x coordinate of the map (UTM projection),"minimum_y"– the minimum y coordinate of the map (UTM projection),"maximum_x"– the maximum x coordinate of the map (UTM projection),"maximum_y"– the maximum y coordinate of the map (UTM projection),
Background
The background component consists of the 8 tiles, each one representing the tile, that surrounds the map. The tiles are named as the cardinal points, e.g. “N”, “NE”, “E” and so on.
Example of the Background component:
"Background": {
"N": {
    "center_latitude": 45.30414170952092,
    "center_longitude": 20.237433441210115,
    "epsg3857_string": "2251363.25324853,2254278.318028022,5668072.719985372,5670987.784803056 [EPSG:3857]",
    "height": 2048,
    "width": 2048,
    "north": 45.31335074975637,
    "south": 45.29493266928547,
    "east": 20.250526677438195,
    "west": 20.224340204982035
},
}
And here’s the list of the fields:
"center_latitude"– the latitude of the center of the tile,"center_longitude"– the longitude of the center of the tile,"epsg3857_string"– the string representation of the bounding box in the EPSG:3857 projection, it is required to obtain the satellite images in the QGIS,"height"– the height of the tile in meters,"width"– the width of the tile in meters,"north"– the northern border of the tile,"south"– the southern border of the tile,"east"– the eastern border of the tile,"west"– the western border of the tile,
Texture schema
maps4fs uses a simple JSON file to define the texture schema. For each ofthe supported games, this file has unique entries, but the structure is the same. Here’s an example of the schema for Farming Simulator 25:
[
  {
    "name": "forestRockRoots",
    "count": 2,
    "exclude_weight": true
  },
  {
    "name": "grass",
    "count": 2,
    "tags": { "natural": "grassland" },
    "color": [34, 255, 34],
    "priority": 0
  },
  {
    "name": "grassClovers",
    "count": 2
  },
  {
    "name": "grassCut",
    "count": 2
  },
  {
    "name": "grassDirtPatchy",
    "count": 2,
    "tags": { "natural": ["wood", "tree_row"] },
    "width": 2,
    "color": [0, 252, 124]
  }
]
Let’s have a closer look at the fields:
name– the name of the texture. Just the way the file will be named.count– the number of textures of this type. For example, for the dirtMedium texture there will be two textures: dirtMedium01_weight.png and dirtMedium02_weight.png. ℹ️ There’s one texture that has count0, it’s the waterPuddle texture from FS22, which is not present in FS25.tags– the tags from the OpenStreetMap data. Refer to the section Supported objects to see the list of supported tags. If there are no tags, the texture file will be generated empty and no objects will be placed on it.width– the width of the texture in meters. Some of the objects from OSM (roads, for example) are lines, not areas. So, to draw them correctly, the tool needs to know the width of the line.color– the color of the texture. It’s used only in the preview images and has no effect on the map itself. But remember that previews are crucial for the map-making process, so it’s better to set the color to something that represents the texture.priority– the priority of the texture for overlapping. Textures with higher priorities will be drawn over the textures with lower priorities. ℹ️ The texture with 0 priority considers the base layer, which means that all empty areas will be filled with this texture.exclude_weight– this is only used for the forestRockRoots texture from FS25. It just means that this texture has noweightpostfix, that’s all.usage– the usage of the texture. Mainly used to group different textures by the purpose. For example, thegrass,forest,drain.background– set it to True for the textures, which should have impact on the Background Terrain, by default it’s used to subtract the water depth from the DEM and background terrain.info_layer– if the layer is saving some data in JSON format, this section will describe it’s name in the JSON file. Used to find the needed JSON data, for example for fields it will befieldsand as a value – list of polygon coordinates.invisible– set it to True for the textures, which should not be drawn in the files, but only to save the data in the JSON file (related to the previous field).procedural– is a list of corresponding files, that will be used for a procedural generation. For example:"procedural": ["PG_meadow", "PG_acres"]– means that the texture will be used for two procedural generation files:masks/PG_meadow.pngandmasks/PG_acres.png. Note, that the one procuderal name can be applied to multiple textures, in this case they will be merged into one mask.border– this value defines the border between the texture and the edge of the map. It’s used to prevent the texture from being drawn on the edge of the map. The value is in pixels.
Background terrain
The tool now supports the generation of the background terrain. If you don’t know what it is, here’s a brief explanation. The background terrain is the world around the map. It’s important to create it because if you don’t, the map will look like it’s floating in the void. The background terrain is a simple plane that can (and should) be textured to look fine.
So, the tool generates the background terrain in the form of the 8 tiles, which surround the map. The tiles are named as the cardinal points, e.g. “N”, “NE”, “E” and so on. All those tiles will be saved in the background directory with corresponding names: N.obj, NE.obj, E.obj, and so on.
If you don’t want to work with separate tiles, the tool also generates the FULL.obj file, which includes everything around the map and the map itself. It may be a convenient approach to work with one file, one texture, and then just cut the map from it.
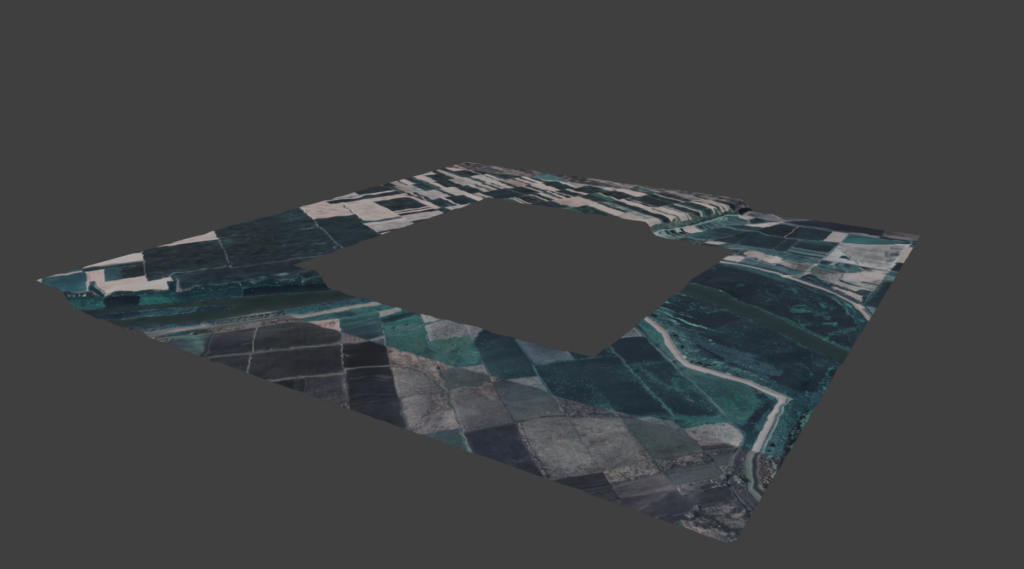
➡️ No matter which approach you choose, you still need to adjust the background terrain to connect it to the map without any gaps. But with a single file, it’s much easier to do.
If you’re willing to create a background terrain, you will need Blender, the Blender Exporter Plugins, and the QGIS. You’ll find the download links in the Resources section.
If you’re afraid of this task, please don’t be. It’s really simple and I’ve prepared detailed step-by-step instructions for you, you’ll find them in the separate README files. Here are the steps you need to follow:
- Download high-resolution satellite images.
- Prepare the i3d files.
- Import the i3d files to Giants Editor.
Overview image
The overview image is an image that is used as an in-game map. No matter what the size of the map, this file is always 4096x4096 pixels, while the region of your map is 2048x2048 pixels in the center of this file. The rest of the image is just here for a nice view, but you still may add satellite pictures to this region.

Cool image by @ZenJakey.
So, in the same way, you’ve downloaded the satellite images for the background terrain, you can download them for the overview image. Just use the epsg3857_string from the generation_info.json file. You’ll find the needed string in the Config component in the Overview section:
"Config": {
    "Overview": {
        "epsg3857_string": "2249906.6679576184,2255734.9033189337,5663700.389039194,5669528.6247056825 [EPSG:3857]",
    }
},
After that, you need to resize the image to 4096×4096 pixels and convert it to the .dds format.
DDS conversion
The .dds format is the format used in the Farming Simulator for the textures, icons, overview, and preview images. There a plenty of options to convert the images to the .dds format, you can just google something like png to dds, and the first link probably will help you with it.
List of the important DDS files:
icon.dds– 256×256 pixels, the icon of the map,preview.dds– 2048×2048 pixels, the preview image of the map on the loading screen,mapsUS/overview.dds– 4096×4096 pixels, the overview image of the map (in-game map)
Advanced settings
You can also apply some advanced settings to the map generation process.
DEM Advanced settings
-
Multiplier: the height of the map is multiplied by this value. So the DEM map is just a 16-bit grayscale image, which means that the maximum available value there is 65535, while the actual difference between the deepest and the highest point on Earth is about 20 km. Just note that this setting mostly does not matter, because you can always adjust it in the Giants Editor, learn more about the DEM file and the heightScale parameter in docs. To match the in-game heights with SRTM Data provider, the recommended value is 255 (if easy mode is disabled), but depending on the place, you will need to play with both multiplier and the height scale in Giants Editor to find the best values.
-
Blur radius: the radius of the Gaussian blur filter applied to the DEM map. By default, it’s set to 21. This filter just makes the DEM map smoother, so the height transitions will be more natural. You can set it to 1 to disable the filter, but it will result in a Minecraft-like map.
-
Plateau: this value will be added to each pixel of the DEM image, making it “higher”. It’s useful when you want to add some negative heights on the map, that appear to be in a “low” place. By default, it’s set to 0.
-
Water depth: this value will be subtracted from each pixel of the DEM image, where water resources are located. Pay attention that it’s not in meters, instead it in the pixel value of DEM, which is 16 bit image with possible values from 0 to 65535. When this value is set, the same value will be added to the plateau setting to avoid negative heights.
Background terrain Advanced settings
-
Generate background – if enabled, the obj files for the background terrain will be generated. You can turn it off if you already have those files or don’t need them. By default, it’s set to True.
-
Generate water – if enabled, the water planes obj files will be generated. You can turn it off if you already have those files or don’t need them. By default, it’s set to True.
-
Resize factor – the factor by which the background terrain will be resized. It will be used as 1 / resize_factor while generating the models. Which means that the larger the value the more the terrain will be resized. The lowest value is 1, in this case background terrain will not be resized. Note, than low values will lead to long processing and enormous size of the obj files.
-
Remove center – if enabled, the playable region (map terrain) will be removed from the background terrain. Note, that it will require low resize factors, to avoid gaps between the map and the background terrain.
-
Apply decimation – if enabled, the mesh will be simplified to reduce the number of faces.
-
Decimation percent – the target percentage of decimation. The higher the value, the more simplified the mesh will be. Note, that high values will break the 3D model entirely.
-
Decimation agression – the aggression of the decimation. The higher the value, the more aggressive the decimation will be, which means the higher it will affect the geometry. It’s not recommended to make it higher than the default value, otherwise the background terrain will not match the map terrain.
GRLE Advanced settings
-
Farmlands margin – this value (in meters) will be applied to each farmland, making it bigger. You can use the value to adjust how much the farmland should be bigger than the actual field. By default, it’s set to 3.
-
Random plants – when adding decorative foliage, enabling this option will add different species of plants to the map. If unchecked only basic grass (smallDenseMix) will be added. Defaults to True.
-
Add Farmyards – if enabled, the tool will create farmlands from the regions that are marked as farmyards in the OSM data. Those farmlands will not have fields and also will not be drawn on textures. By default, it’s turned off.
-
Base price – the base price of the farmland. It’s used to calculate the price of the farmland in the game. In default in-game maps this value equals to 60000.
-
Price scale – is a value in percent which will be applied to all farmnlands. The price per Ha will be calculated as
base_price * price_scale / 100. By default, it’s set to 100%. -
Base grass – you can select which plant will be used as a base grass on the map.
-
Plants island minimum size – when random plants are enabled, the generator will add islands of differents plants to the map and choose the random size of those island between the minimum and maximum values. This one is the minimum size of the island in meters.
-
Plants island maximum size – it’s the same as above, but for the maximum size of the island in meters.
-
Plants island vertex count – the number of vertices in the island. The higher the value, the more detailed the island will be. Note, that high values will turn the smoothed island into geometric madness.
-
Plants insland rounding radius – used to round the vertices of the island. The higher the value, the more rounded the island will be.
-
Plants island percent – defines the relation between the map size and the number of islands of plants. For example, if set to 100% for map size of 2048 will be added 2048 islands of plants.
I3D Advanced settings
-
Forest density – the density of the forest in meters. The lower the value, the lower the distance between the trees, which makes the forest denser. Note, that low values will lead to enormous number of trees, which may cause the Giants Editor to crash or lead to performance issues. By default, it’s set to 10.
-
Trees relative shift – represents the maximum possible shift of the tree from it’s original position in percents of the forest density value. The higher the value, the more the trees will be shifted from their original positions. Warning: higher values can lead to overlapping trees.
Texture Advanced settings
-
Dissolve – if enabled, the values from one layer will be splitted between different layers of texture, making it look more natural. Warning: it’s a time-consuming process, recommended to enable it, when you generating the final version of the map, not some test versions.
-
Fields padding – this value (in meters) will be applied to each field, making it smaller. It’s useful when the fields are too close to each other and you want to make them smaller. By default, it’s set to 0.
-
Skip drains – if enabled, the tool will not generate the drains and ditches on the map. By default, it’s set to False. Use this if you don’t need the drains on the map.
-
Use cache – if enabled, the tool will use the cached OSM data for generating the map. It’s useful when you’re generating the same map multiple times and don’t want to download the OSM data each time. But if you’ve made some changes to the OSM data, you should disable this option to get the updated data. By default, it’s set to True. This option has no effect when you’re using the custom OSM file.
Splines Advanced settings
- Splines density – number of points, which will be added (interpolate) between each pair of existing points. The higher the value, the denser the spline will be. It can smooth the splines, but high values can in opposite make the splines look unnatural.
Satellite Advanced settings
- Download images – if enabled, the tool will download the satellite images for the background terrain and the overview image. If you already have the images, you can turn it off.
- Satellite margin – the margin around the map in meters. It’s useful when you want to have some space around the map on the satellite images. By default, it’s set to 100.
- Zoom level – the zoom level of the satellite images. The higher the value, the more detailed the images will be. By default, it’s set to 14 and this option is disabled on a public version of the app.
Expert Settings
The tool also supports the expert settings. Do not use them until you read the documentation and understand what they do. Here’s the list of the expert settings:
-
Enable debug logs – if enabled, the tool will print the debug logs to the console. It can be useful if you’re using with a custom OSM map, have some issues with it and want to know what’s wrong.
-
Upload custom OSM file – you’ll be able to upload your own OSM file. Before using it, carefully read the Custom OSM documentation, otherwise, the tool will not work as expected.
-
Show raw configuration – you’ll be able to change all the settings in a single JSON file. It’s useful if you want to save the configuration and use it later, without changing the settings in the UI. Be extremely careful with this setting, because you can break the tool with incorrect settings.
-
Show schemas – you’ll be able to edit or define your own texture or tree schemas. It’s useful if you want to add some custom textures or trees to the map. Refer to the Texture schema section to learn more about the schema structure. Any incorrect value here will lead to the completely broken map.
-
Upload custom background image – if you have an image, which represents the map and background terrain you can use it for generation. Note, that the image should meet the following requirements: 1:1 aspect ratio, size = map size + 2048 * 2, it should be uint16 (unsigned 16-bit integer) grayscale (single channel) image. The image should be in the PNG format. If any of the requirements are not met, the tool raises an error. If you’re using rotation, the image should already be rotated.
-
Upload custom map template – you can use your own map template for generation. Note, that is must have the same structure as built-in templates. It’s recommended to use the built-in templates and edit them as you need, instead of creating the new ones from scratch.
-
Manage cache – allows you to clean the cache of the tool. It’s useful when you’re generating the map multiple times and the tool uses the cached data. By cleaning the cache you’ll force the tool to download the fresh data. It’s not recommended to clean the cache unless you have some issues with it.
Resources
In this section, you’ll find a list of the resources that you need to create a map for the Farming Simulator.
To create a basic map, you only need the Giants Editor. But if you want to create a background terrain – the world around the map, so it won’t look like it’s floating in the void – you also need Blender and the Blender Exporter Plugins. To create realistic textures for the background terrain, the QGIS is required to obtain high-resolution satellite images.
- Giants Editor – the official tool for creating maps for the Farming Simulator.
- Blender – the open-source 3D modeling software that you can use to create models for the Farming Simulator.
- Blender Exporter Plugins – the official plugins for exporting models from Blender to i3d format (the format used in the Farming Simulator).
- QGIS – the open-source GIS software that you can use to obtain high-resolution satellite images for your map.
- CompressPngCom – the online tool to compress the PNG images. May be useful to reduce the size of the satellite images.
- AnyConv – the online tool to convert the PNG images to the DDS format. You’ll need this format for the textures, icons, overview, and preview images.
V1.8.228
* Docs update.

* Docs update.

* Show FS22 warning.

* Public UI update.
1.8.227

Return warning about disabled settings on public app
1.8.219

WebUI updates
1.8.215
* Docs updates.
1.8.214

Funding updates
1.8.213
* Reversed splines, show tags in spline names.
* Linter updates.
1.8.210
* Public history.

* Removed comments.
1.8.208

Dockerfile update.
1.8.203
Raise errors while checking DTM Providers
1.8.199
* Disable DTM Providers on public app.

* Remove debug code.
1.8.198

DEM validation
1.8.197
* Import updates.
1.8.195

Mesh resize update.
1.8.190

Hotfix: Remove OSMPS directory.
1.8.187

Units in settings.
1.8.176
Denmark DTM provider
* DEM settings refactoring
* linting
* fix formula for z_scaling_factor
* remove superfluous print statement
* fix water depth subtraction
* remove duplicate comment
* Restore sigma
* blur data in the right place
* SRTM Instructions.
* Adjust docs to match dem settings
Credits:
iwatkot


